Introduction
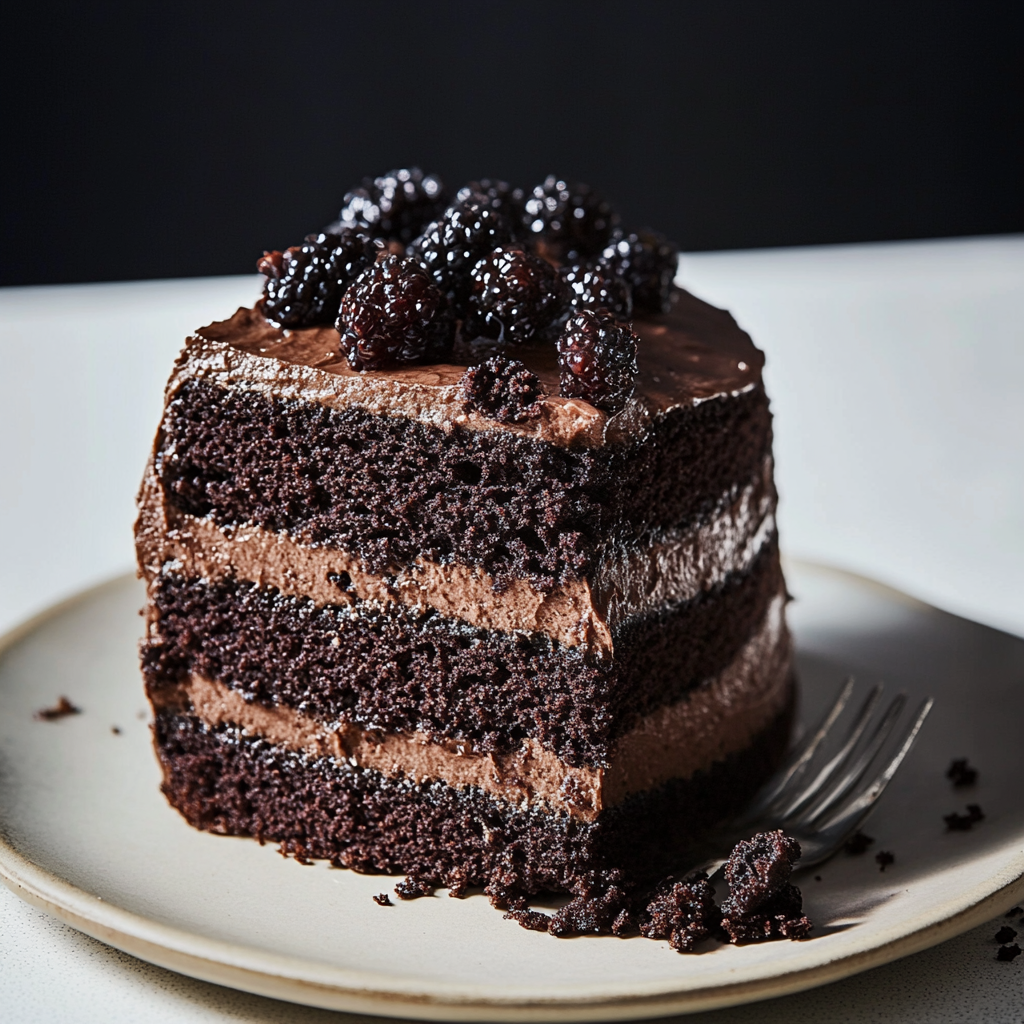
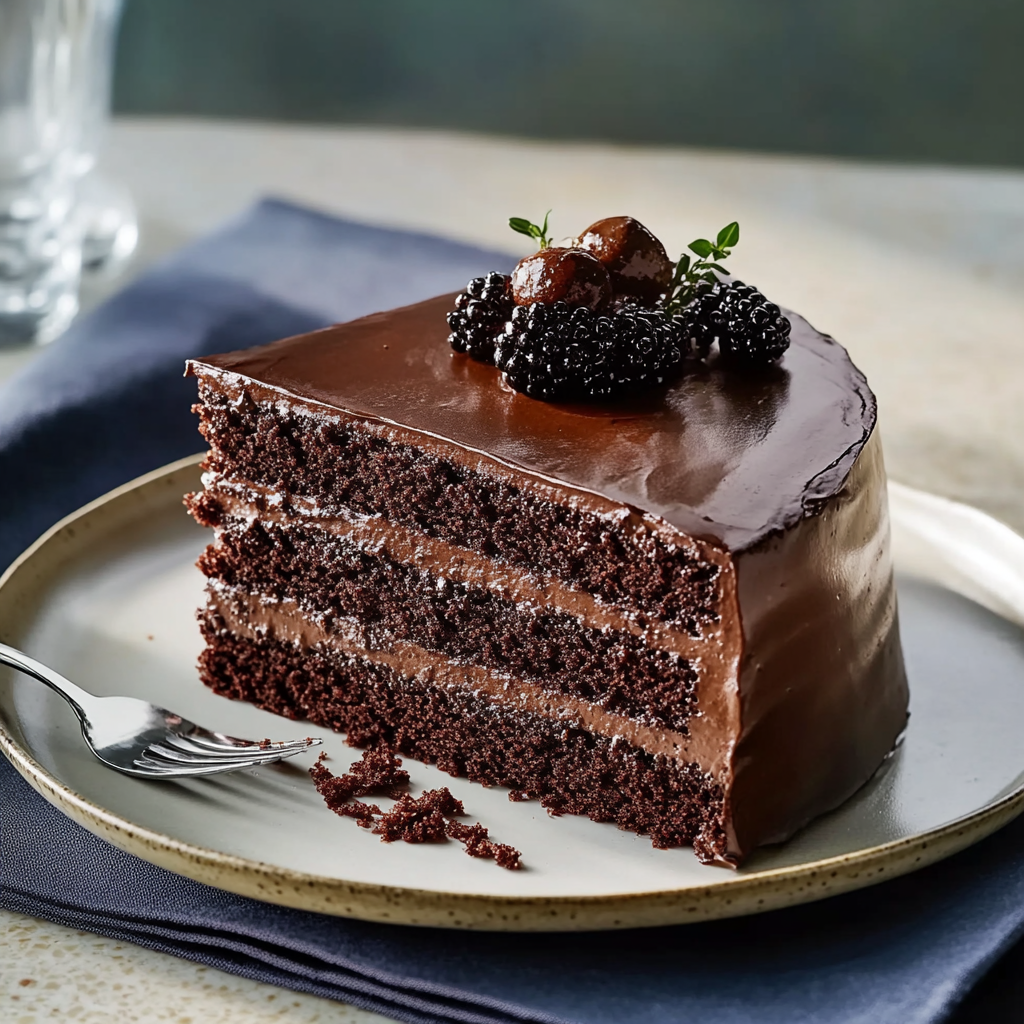
Have you ever tasted a cake that feels like a warm hug? The Blackout Cake is just that—a decadent delight that envelops your senses in rich chocolate flavor and velvety texture. With each bite, you can savor the layers of moist chocolate sponge and luscious frosting that create a truly indulgent experience.

This cake is perfect for celebrations or simply as a treat for yourself after a long day. Imagine serving it at your next family gathering or enjoying a slice with friends over coffee. The anticipation builds as you slice into its deep, dark layers, revealing the deliciousness that awaits. Get ready to impress your guests with this show-stopping dessert!
Why You’ll Love This Blackout Cake
Rich Chocolate Flavor: This blackout cake features layers of deep chocolate sponge, making it an irresistible choice for chocolate lovers. The combination of cocoa powder and melted chocolate creates a flavor profile that’s intense yet balanced.
Moist and Tender: One bite and you’ll discover how moist this cake truly is. Thanks to the careful mixing of ingredients and the addition of sour cream, every slice remains tender and delightful—perfect for any occasion.
Easy to Customize: Whether you prefer a simple frosting or want to get creative with toppings, this blackout cake is versatile enough to suit any taste. Add fresh berries or sprinkle with nuts for added texture.
Perfect for Any Occasion: From birthdays to holidays, this blackout cake is the ultimate dessert to share. Its impressive appearance will have everyone talking, making it ideal for special gatherings or everyday indulgence.
Ingredients
Here’s what you’ll need to make this delicious dish:
- All-Purpose Flour: Use high-quality flour for the best structure in your cake.
- Cocoa Powder: Choose unsweetened cocoa powder for rich chocolate flavor.
- Baking Powder: Fresh baking powder ensures proper rising during baking.
- Sugar: Granulated sugar adds sweetness and moisture to your layers.
- Sour Cream: Sour cream contributes to the moistness of each layer while adding a subtle tang.
- Eggs: Use large eggs at room temperature for better incorporation into the batter.
- Butter: Unsalted butter provides richness; be sure to soften it before mixing.
For the Frosting:
- Heavy Cream: Heavy cream is essential for whipping up fluffy frosting.
The full ingredients list, including measurements, is provided in the recipe card directly below.
How to Make Blackout Cake
Follow these simple steps to prepare this delicious dish:
Preheat Your Oven: Preheat your oven to 350°F (175°C). Grease two round cake pans with butter and line them with parchment paper for easy removal.
Mix Dry Ingredients: In a bowl, sift together all-purpose flour, cocoa powder, baking powder, and salt. This step ensures there are no lumps in your dry mixture.
Cream Butter and Sugar: In another bowl, beat softened butter with granulated sugar until light and fluffy. This should take about three minutes on medium speed.
Add Eggs and Sour Cream: Slowly add eggs one by one into the creamed mixture along with sour cream. Mix well until fully incorporated before moving on.
Combine Wet and Dry Mixtures: Gradually add the dry ingredients into your wet mixture while alternating with milk. Continue mixing until you achieve a smooth batter consistency.
Bake the Cakes: Divide your batter evenly between the prepared pans. Bake in preheated oven for approximately 30-35 minutes or until a toothpick inserted comes out clean.
After baking, let cool in pans for about ten minutes before transferring them onto wire racks to cool completely.
Tips and Tricks
Here are some helpful tips to ensure the best results for your dish:
Use Room Temperature Ingredients: Ensure all ingredients like eggs and butter are at room temperature before starting; this helps create a smooth batter.
Don’t Overmix Your Batter: Overmixing can lead to tough cakes; mix just until combined for tender layers.
Check Oven Temperature Regularly: Ovens can vary in temperature accuracy; use an oven thermometer if unsure about yours.
Cool Cakes Completely Before Frosting: Always allow cakes to cool completely before applying frosting; otherwise, it may melt off or slide around.
Add Texture With Toppings: Consider adding shaved chocolate or crushed nuts on top of your frosting for extra flair and crunch.
Enjoy making this delightful blackout cake!
Mistakes to avoid
Not using quality cocoa powder
Using low-quality cocoa powder can significantly affect the flavor of your Blackout Cake. Opt for high-quality Dutch-processed cocoa for a rich, deep chocolate taste. This type of cocoa enhances the overall flavor and gives your cake that dark, luscious appearance. If you settle for a cheaper brand, you may end up with a cake that lacks the robust chocolate essence you desire. Invest in good cocoa powder to elevate your baking experience and impress your guests with a delightful dessert.
Overbaking the cake layers
One of the most common mistakes when making Blackout Cake is overbaking the layers. Keep a close eye on the cakes as they bake. Ideally, you should check them five minutes before the recommended time. Insert a toothpick in the center; if it comes out with moist crumbs, it’s perfect. Overbaked layers will become dry and lose their tenderness. For best results, bake at 350°F for about 25 to 30 minutes but remember to adjust based on your oven’s characteristics.
Skipping the cooling time
Cooling your cake layers properly is crucial for achieving the perfect Blackout Cake. If you try to frost hot or warm layers, your frosting can melt and slide off, resulting in a messy presentation. Allow the cakes to cool in their pans for about 10 minutes before transferring them to wire racks. Once they are completely cool—at least an hour—proceed with frosting. This step ensures that each layer holds its shape and that your cake looks as good as it tastes.
Ineffective frosting technique
A common error in making Blackout Cake lies in how you apply the frosting. Instead of slapping it on haphazardly, use an offset spatula for even distribution. Start by applying a thin layer of frosting between each cake layer to lock in moisture and create a stable base for additional frosting. After layering, apply a crumb coat—a thin layer of frosting that catches any loose crumbs—then chill briefly before adding the final coat. This technique helps achieve a smooth and professional finish that showcases your delicious creation beautifully.
Serving Suggestions
This Blackout Cake is versatile and pairs wonderfully with a variety of accompaniments. Serve it with a scoop of vanilla ice cream to create a delightful contrast between the rich chocolate and the creamy texture. The cold ice cream will melt slightly on the warm cake, enhancing every bite. For a more indulgent experience, drizzle warm chocolate sauce over each slice. This adds an extra layer of sweetness and decadence that chocolate lovers will appreciate.
Another great option is to enjoy this cake alongside a cup of freshly brewed coffee or espresso. The bitterness of the coffee balances the sweetness of the cake, making each forkful even more satisfying. Additionally, you can serve slices with fresh berries like raspberries or strawberries. Their tartness complements the richness of the Blackout Cake, providing a refreshing contrast that elevates your dessert experience.
For an elegant presentation, consider garnishing your Blackout Cake with whipped cream and chocolate shavings. This not only looks appealing but also adds a light texture that contrasts beautifully with the dense cake. A sprinkle of sea salt on top can enhance the flavors even further, making every bite memorable.
Lastly, this cake makes for an excellent birthday or celebration dessert when layered with additional frosting and decorated creatively. Personalize it for special occasions using themed decorations or colors to match your party’s theme.
FAQs
What is Blackout Cake?
Blackout Cake is a rich chocolate cake known for its deep flavor and moist texture. It traditionally features layers of dark chocolate cake filled with chocolate pudding or frosting, topped with more chocolate frosting or ganache. This decadent dessert has become popular due to its intense chocolaty taste and eye-catching appearance.
Can I make Blackout Cake in advance?
Absolutely! You can prepare Blackout Cake one to two days ahead of time. Store it in an airtight container at room temperature for best results. If you need to keep it longer, consider refrigerating it but allow it to come to room temperature before serving to restore its moistness and flavor.
How should I store leftover Blackout Cake?
Store leftover Blackout Cake in an airtight container at room temperature if consumed within two days. For longer storage, refrigerate it in an airtight container for up to five days. You can also freeze individual slices wrapped tightly in plastic wrap and foil for up to three months.
Can I use different types of chocolate for Blackout Cake?
Yes! While traditional recipes call for dark chocolate, you can experiment with semisweet or even milk chocolate based on your preference. Keep in mind that using different chocolates may alter the overall sweetness and richness of the cake, so adjust sugar levels accordingly if needed.
Conclusion
In summary, Blackout Cake is a sumptuous dessert that showcases rich chocolate flavors in every bite. Its versatility allows you to serve it with various accompaniments, ensuring there’s something for everyone to enjoy. Whether paired with ice cream, coffee, or fresh berries, each combination enhances the overall experience of this decadent treat. Preparing this cake ahead of time makes it perfect for gatherings or special occasions without added stress on the day itself. With proper storage techniques, you can savor this indulgent dessert long after it’s made, delighting friends and family alike! Enjoy experimenting with different toppings and variations to find your ideal way to serve this classic dessert!

Indulgent Blackout Cake
- Total Time: 55 minutes
- Yield: Serves 10 slices
Description
Indulge in a slice of heaven with this decadent Blackout Cake, featuring rich layers of chocolate sponge and velvety frosting. Perfect for celebrations or a sweet treat any day, this cake is sure to impress with its moist texture and deep chocolate flavor. Serve it with ice cream or berries for an unforgettable dessert experience.
Ingredients
- All-Purpose Flour
- Unsweetened Cocoa Powder
- Baking Powder
- Granulated Sugar
- Sour Cream
- Eggs
- Unsalted Butter
- Heavy Cream (for frosting)
Instructions
- Preheat your oven to 350°F (175°C). Grease two round cake pans and line with parchment paper.
- Sift together flour, cocoa powder, baking powder, and salt in a bowl.
- In another bowl, beat softened butter with sugar until fluffy. Add eggs one at a time along with sour cream; mix well.
- Gradually combine the dry ingredients with the wet mixture, alternating with milk until smooth.
- Divide batter between prepared pans and bake for 30-35 minutes or until a toothpick comes out clean.
- Let cakes cool in pans for 10 minutes before transferring to wire racks to cool completely.
- Prep Time: 20 minutes
- Cook Time: 35 minutes
- Category: Dessert
- Method: Baking
- Cuisine: American
Nutrition
- Serving Size: 1 slice (100g)
- Calories: 450
- Sugar: 38g
- Sodium: 250mg
- Fat: 22g
- Saturated Fat: 12g
- Unsaturated Fat: 8g
- Trans Fat: 0g
- Carbohydrates: 55g
- Fiber: 3g
- Protein: 6g
- Cholesterol: 65mg
Keywords: Use room temperature ingredients for a smoother batter. Avoid overmixing to ensure tender layers. For added flair, top with fresh berries or nuts.